Tag Archives: Michael’s

28

Well Hello and Happy Monday!

I just realized that I haven’t really been posting much on the weekends…not my intention, but I guess it’s OK because that means that we’ve been busy and still enjoying summer even though school is definitely in full swing again.

*****

Today marks day 28 of my 30 Day Shred.

I have to say that I have been MUCH better this time around. I did take a couple days off due to my knee bothering me, but I did something in lieu of the DVD those days ~ either biking or walking the big loop in our development at night. I love that the DVD is only 30 minutes and I really try to give it my all and make the most of the half hour with Jill and her girls. Also, I’ve been using 4 pound hand weights and I can probably go up to 5 pounders. Today the kids did it with me and used the Handy Manny plastic tools as their hand weights…yes, Squeeze, Pat, Felipe and Dusty joined in on today’s shred ~ WHATEVER works.

I feel great, though and can tell a difference, but I certainly need to tighten up the eating. I was doing great with that for the first two and a half weeks and then got a little lazy.

*****

Speaking of eating better, I have a couple healthy recipes to share since the last couple were far from it…

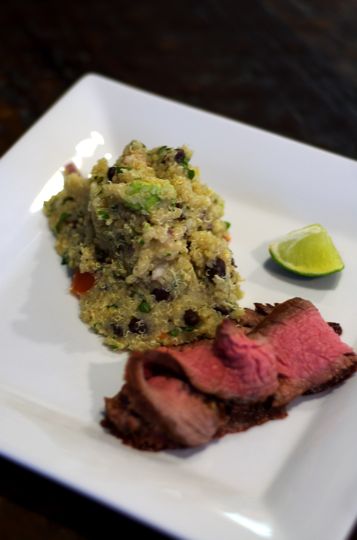
Spicy Honey Lime flank steak and this quinoa salad from Pinterest {thanks Erma for pinning it!}…

I marinated the flank steak in 1/4 cup honey, the juice of 3 limes, 2 tbsp olive oil, 2 minced garlic cloves and 1 tbsp Sriracha for about an hour and a half, flipping from time to time. Jay grilled for about 6 minutes on each side. Will make great salads and sandwiches throughout the week.

I also made Giada’s gazpacho last week…

It’s verrry healthy if you don’t put anything on it! She topped it with some polenta croutons which looked amazing. I, however, threw on some cheese & garlic croutons from my pantry. Would also be nice with a little dollop of light sour cream and some crushed tortilla chips.

The perfect summer soup since it’s served cold and has a nice refreshing kick to it.

*****

LOVE this pic of Holden and me taken this weekend at the concert in the park…

{yes, I am fully clothed and no, Holdy is not drugged}

*****

This week is a jumble of the new school schedule, homework {already!}, pool time {if they behave!}, park play date, dance class and two birthday parties this weekend.

Never a dull moment.

Hope your week is off to a successful start!
Jill

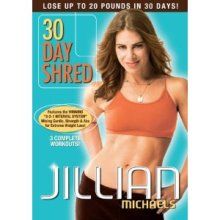
Wondering why I never mentioned my girl, Jillian, after this?

{via}

Well, that’s because I was a loser and did the video here and there for like a week….it was more like the {30 Day DEAD} for me.

Of course I came up with all sorts of excuses that I had to get ready for vacation, blah blah blah, but now that I spent 2 weeks eating everything under the sun, I must turn this on for the next 29 days and DO IT!

I know it works because my girlfriend Lisa looks amazing!

*****

Need some fresh, new summer salad ideas? Head on over here today where I shared my Asian Chop Chop salad and see what other salad inspirations you can find.

Happy Wednesday!

Thrifty Thursday ~ Simple, Inexpensive, Homespun Birthday Invites

I’ve mentioned this before…you can spend LOTS on invitations.

I refuse to do that anymore. Personally, I also refuse to use evite. I think evite is genius and I’m all for being more {green}, but I prefer and enjoy coming up with cheap, crafty invites for my kids’ birthday parties. I love the idea of a hand or snail mail delivered invitation. I guess I’m sort of old-fashioned that way…

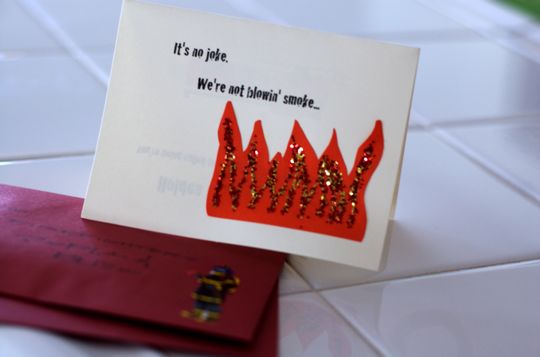
This year for Holden’s party I found some blank note cards at Michael’s for 50¢ a pack {8 cards/package}. I chose these specifically because of the red envelopes ~ so much better than plain, boring white!

The cards had a small graphic printed on the bottom right corner so I just made a {flame} template out of cardboard, cut it out, traced several flames on some orange construction paper, cut those out, used Elmer’s glue and some red & gold glitter and voila! It covered the picture perfectly. I chose a font we already had {cracked}, formatted it, came up with the wording and popped them through our printer.

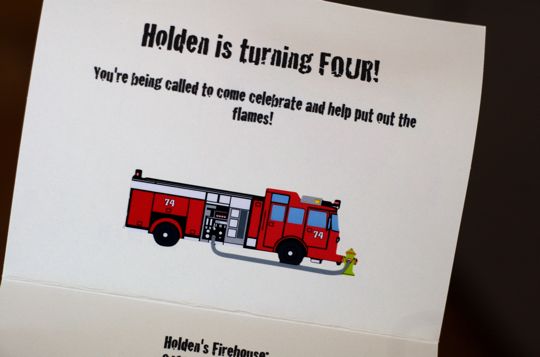
I picked up some fire truck stickers at Target for 99¢ in the scrapbook area and added one to the inside of the invite and also to the front of the envelopes.

I addressed them “Firefighter so-and-so” and put the return address for the ones I mailed as “Fire Chief Holden”.

I calculated the cost of these invitations as less than 25¢ apiece.

We hand delivered most of them to save on postage, too!

Hammer Time!

I’ve been wanting to do some sort of photo gallery in our stairwell. Something to “cover up” the white walls…..they’re killin’ me! I don’t like white walls, but since we’re renting, there really isn’t much I can do….I guess I could get the OK to paint from the property management peeps, but since I also don’t love to paint, I will just live with the white walls while we’re here and try to spice them up a little. I haven’t wanted to hang too much, but since I don’t know how long we’ll be here, I wanted to make the place as homey as possible.

So, I was at my second home last week (hint: red bulls eye) and came across a set of 10 black frames in differing sizes for $6.24! (marked down from $24.99!!) They even included some layout suggestions on the box. The frames are lightweight which is great so I was able to use tiny nails and didn’t have to drive big nails into the wall. Yesterday I grabbed a hammer, some nails and a measuring tape and went to town.

But the frames themselves were a little TOO simple ~ I needed something else to liven them up a bit…

At Michael’s I found some black letters with little hooks on the back for $1.00 each. I had a coupon for 20% off so they came to 80 cents each! So, for an add’l $3.20, I was able to complete my gallery and be pretty pleased. For a total of $9.44 (not including tax or the cost of the photos) I created this:

I’m pretty impressed.

Now, I am SUPER DUPER anal about picture hanging. Must. Use. Level. It was hard for me to kind of “eyeball” this project. What I did was get a large piece of paper from Elliott’s easel, layout the frames in the order I wanted them, traced the frames, hung the paper on the wall with tape, hammered the nails into the wall through the paper and then removed the paper before hanging the pics. This worked pretty well.

I am constantly going to be on the lookout for crooked frames here since that is another one of my pet peeves! But all in all, I think it turned out OK for a temporary fix! Now I just need to find four more of my favorite pics to complete the gallery…shouldn’t be too hard.

First “crafty” project of the year….cheap & successful. Can’t beat that!