Home Is Where The Heart Is
I’m working on a little gallery wall in our great room…it’s coming together slowly but surely.
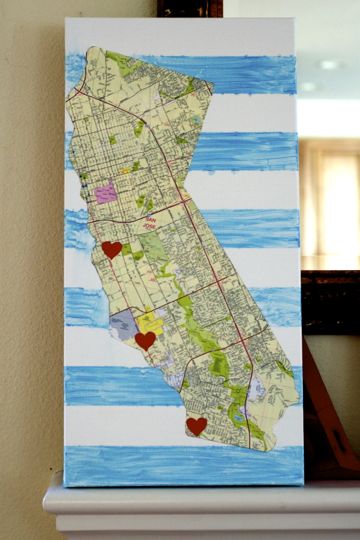
This weekend I finished up a canvas commemorating the cities that we’ve lived in as a family which will eventually become part of the wall.
This was a relatively easy and inexpensive little project. I am mad at myself, however, that I hurried through it and therefore made a few smudges due to my ADD in the crafting department ~ I want things to be dry and done immediately. I don’t really like to wait for the paint to dry and like to just get on with the show and finish it. Something I definitely need to work on….as you can see, I got a little too aggressive a little too soon with the Modge Podge without waiting for the paint to completely dry. I am trying to convince myself that it lends an organic, casual feeling to the piece which I am becoming okay with!
Here’s how this little diddy went down…
1. I found an ugly, weird plastic Lakers sign at Wal-mart in the shape of California…I immediately thought it would make a great template for this project. They were hanging in the clearance area, but did not ring up so. I was not going to pay $10 for an ugly, weird plastic Lakers sign. A return visit a few weeks later found these {lovely} signs marked down to $2 {duh!} and I scooped one up.
2. We had an old street map of San Jose in my glove compartment {hello, who uses maps for driving anymore?} and I traced the California shape onto the map and cut it out.
3. I cut out three little hearts on some red construction paper to identify our {homes} throughout the years in the beautiful Golden State {San Diego, Sunnyvale & Gilroy [San Jose area] & currently Valencia [LA county]}, estimated the location on the map and then glued them on.
4. I then found a canvas at Michael’s for 50% off {12X24 size for $5.99}.
5. Borrowed some of Elliott’s tempera paint in aqua and some thick 2″ painter’s tape from my friend and neighbor, Hollie.
6. Wrap tape around the edges and across the canvas, one next to each other all the way down.
7. Remove every other one to get the striped effect.
8. Use a regular old sponge to brush on the paint because little sponge brush from Joann’s could not be located and I wanted to complete my artwork RIGHT AWAY.
9. Put outside to dry {for longer than I did}. Patience is a virtue.
10. Brush some Modge Podge onto the back of the map and place onto the front of the canvas…smooth out any bubbles. Use a sponge to apply more Modge Podge over the map to secure it down {this is the part when I smudged the paint}.
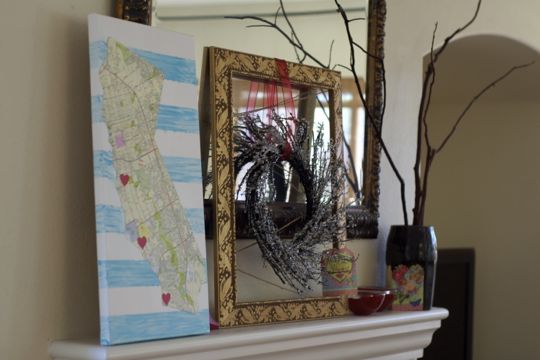
11. Stick up on your mantel to let dry, stand back and think to yourself, “Doesn’t look too bad from far away!”
That’s it! I apologize for my photo-less tutorial. Perhaps when I find some crafting patience, I will take the time to snap some photos, too.
*****
Linking up over at Angry Julie Monday for Wordless Wednesday : Live Creatively


February 6, 2012 @ 4:52 pm
OMG Amy. You are so adorably creative. We do a similar thing on a world map that is framed. We use pins to show where we have traveled. Different colors for how we traveled (road trip, plane, ship..etc) We now have to start adding the kids little adventures too. It’s so nice to look at from time to time.
February 6, 2012 @ 4:58 pm
Thanks, mama! Been trying to do some fun family inspired things for the walls…your idea sounds fabulous too! I love to reminisce about special times over the years and it’s nice to have those memories on display for others to see, as well. XOXO
February 7, 2012 @ 4:58 pm
Looks terrific! 🙂
February 7, 2012 @ 6:37 pm
Seriously, this is amazing! Great job!!
February 8, 2012 @ 6:04 pm
BIG fan of the homegrown stuff!